Gift Subscriptions / Memberships
Gift Subscriptions / Memberships
This guide explains how to enable and use the gift option for subscriptions or memberships.
Note: Only one recipient per order is allowed. If a patron wants to purchase multiple gifts (or one for themselves), separate transactions are required.
Enable the Gift Option
Go to SETUP > SUBSCRIPTIONS > SETTINGS
Toggle on Enable Gift Option
In Gift Email Message, enter the message the recipient will receive
Click Save
Example Gift Message:
Plain Text
You've received a gift subscription!

Congrats {FIRSTNAME} {LASTNAME}!

{GIVERFIRSTNAME} {GIVERLASTNAME} has given you a subscription to Example Demo Theatre.

To use your subscription, copy and paste the link below into your web browser. Your code will appear in large letters on the upper right corner of the subscription page. Use this code at checkout when booking online.

YOUR SUBSCRIPTION:
Gifting Online
Once enabled, customers will see a “Give As Gift” option when purchasing subscriptions or memberships online.
During checkout, they can:
Enter the recipient’s contact information
Choose to send the subscription electronically to the recipient
Gifting at the Box Office
Add the subscription or membership and load the purchaser
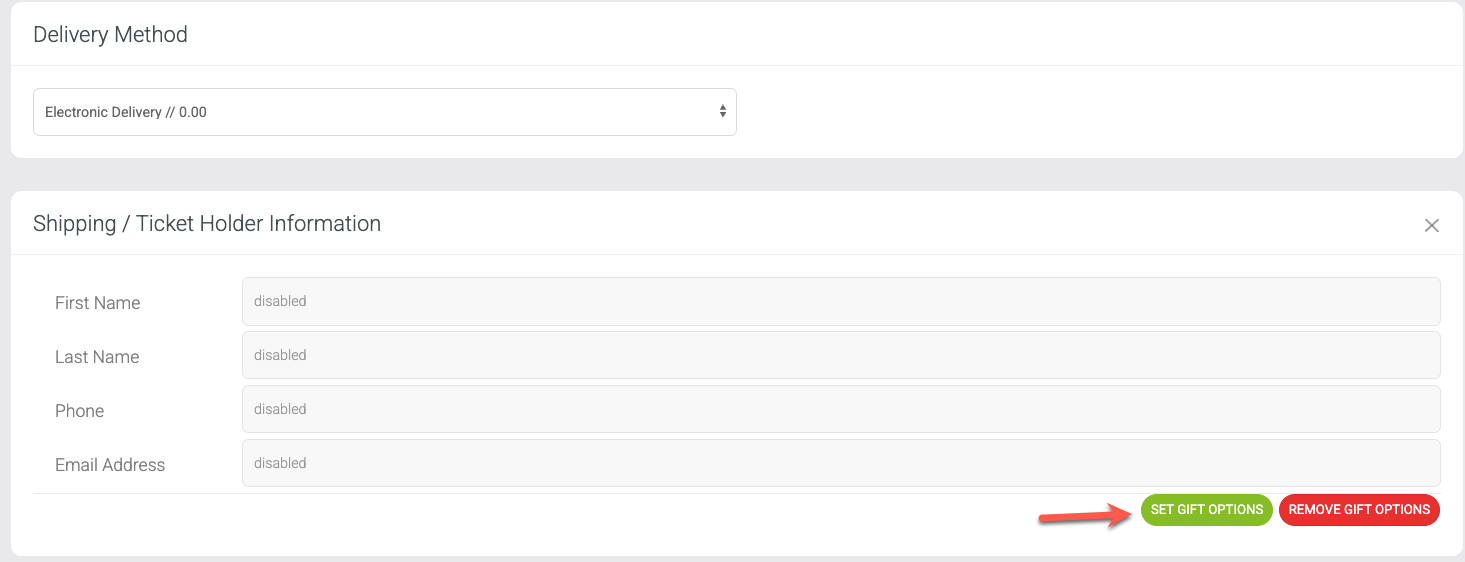
On the checkout screen, open Shipping / Ticket Holder Information
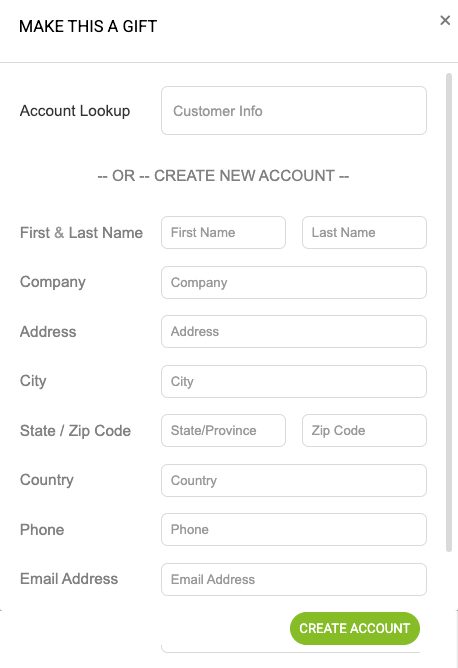
Select the gift option button
Enter the recipient’s information

Important:
Gift subscriptions are not automatically sent to the recipient after purchase.
To send it:
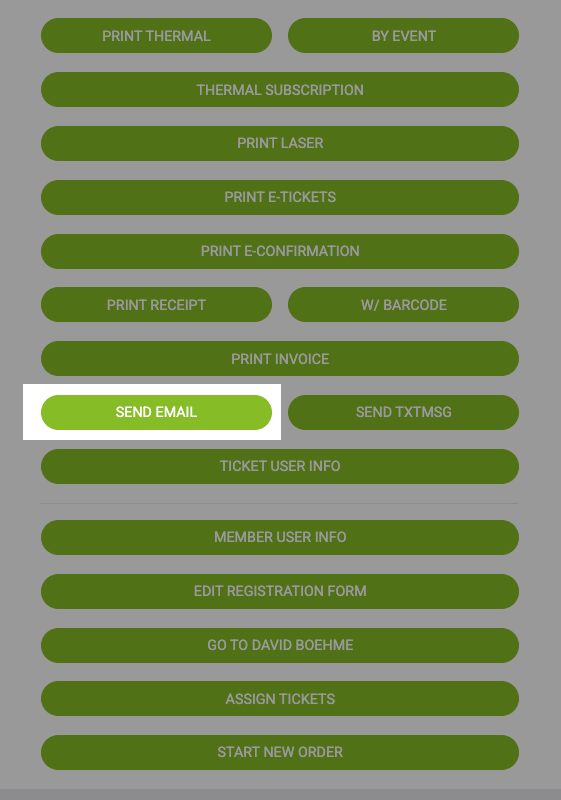
After completing the order, click Send Email
Choose the option to send a copy of the subscription to the recipient
How to Reassign a Subscription or Membership
If a subscription or membership was mistakenly assigned to the wrong account during purchase, you can manually reassign it to the correct customer account.
From the Subscriber or Member List
Navigate to CRM > Customer Management > Subscribers/Members.
Search for the subscription or membership you want to reassign.
Click the gear icon, then select Edit Subscriber or Edit Member.
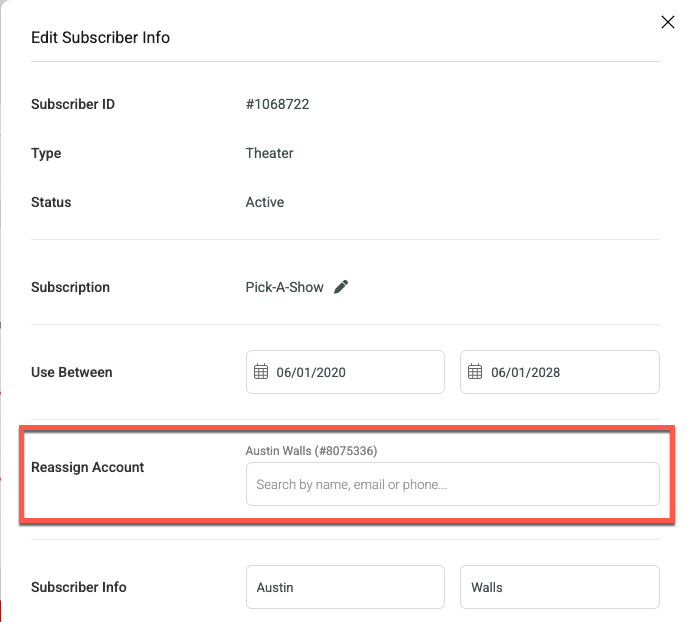
In the Reassign Account field, search for the new account holder by name, email address, or phone number.
Select the correct customer account.
Click OK to complete the change.
From the Customer Account
Navigate to CRM > Customer Management > Customer Details.
Search for the current owner of the subscription or membership.
Locate the subscription or membership and click the pencil icon.
In the Reassign Account field, search for the new account holder by name, email address, or phone number.
Select the correct customer account.
Click OK to complete the change.