Shared Allocation
How to Use Shared Allocation for General Admission Events
Use one shared inventory pool across multiple general admission ticket types.
Shared allocation is useful when you sell multiple general admission ticket types - such as Adult, Student, and Senior - but all of those tickets should pull from the same overall event capacity.
Instead of splitting the venue capacity between ticket types, you assign the ticket types to the same shared allocation bucket. Each sale reduces the inventory available to the entire group.
Example
A 100-capacity event can offer Adult, Student, and Senior tickets with each ticket type set to a quantity of 100. If all three ticket types use Shared Allocation #1 with a shared quantity of 100, the combined sales across all three ticket types cannot exceed 100.
How Shared Allocation Works
• Ticket Qty: The maximum quantity you are willing to sell for that individual ticket type.
• Shared Alloc.: The bucket number the ticket will use. VBO provides buckets 1 through 5.
• Shared Allocation Qty: The remaining inventory available to all ticket types assigned to that bucket.
• All ticket types that should share the same inventory must use the same bucket number.
Ticket Type | Ticket Qty | Shared Alloc. | Shared Qty |
Adult | 100 | #1 | 100 |
Student | 100 | #1 | 100 |
Senior | 100 | #1 | 100 |
If tickets have already been sold
Do not enter the original capacity as the shared allocation. Enter the inventory that is still available: maximum capacity minus tickets already sold.
Set Up Shared Allocation
Step 1: Create the general admission ticket types
Go to Events > Price Templates and create or edit the general admission template you plan to use. Add the ticket types you need, such as Adult, Student, and Senior, and set the Available Qty for each ticket type.
Ticket quantity still matters
Shared allocation controls the combined inventory, but the individual ticket Qty can still limit a specific ticket type. If a Student ticket has a Qty of 25, only 25 Student tickets can sell even if the shared bucket still has inventory.
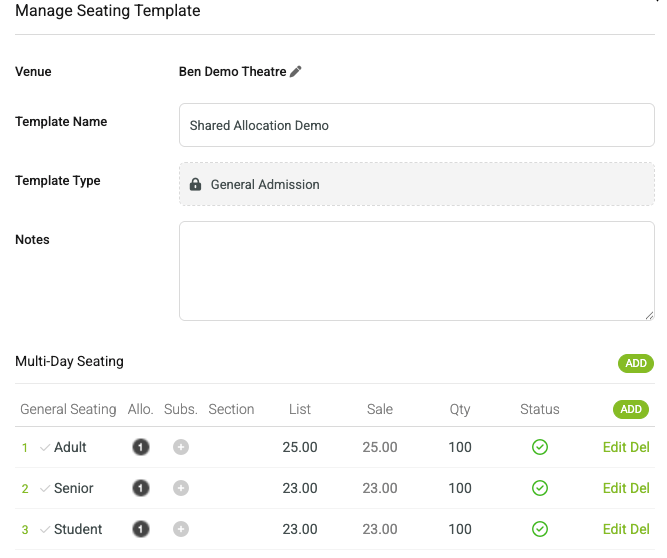
Example: Adult, Student, and Senior ticket types in the same general admission template.
Step 2: Assign the same shared allocation bucket
Edit each ticket type and select a Shared Alloc. number from 1 through 5. Use the same number for every ticket type that should pull from the same inventory pool. In this example, Adult, Student, and Senior all use Shared Allocation #1.
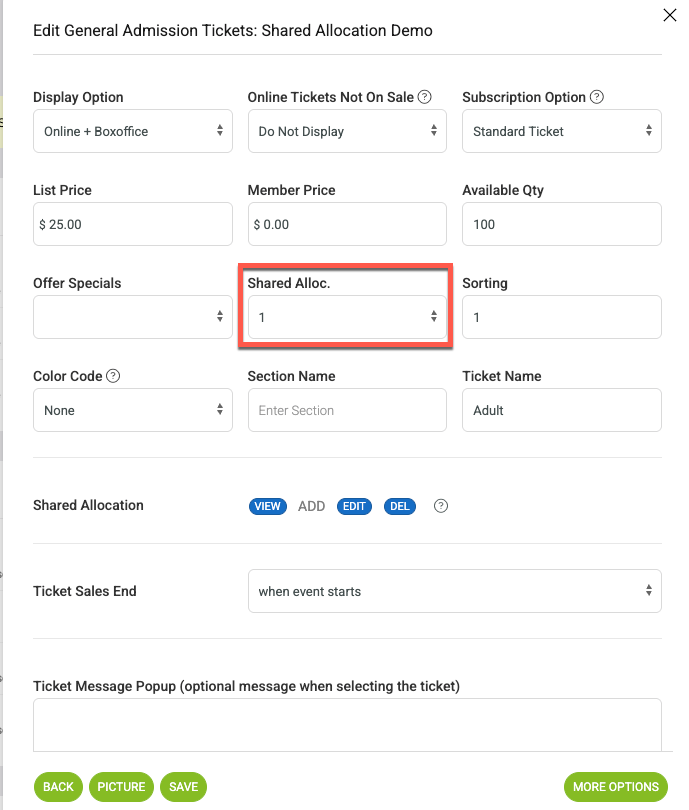
Select the shared allocation bucket on each ticket type.
Step 3: Set the quantity in the shared allocation bucket
In the Shared Allocation area, click ADD or EDIT. Enter the quantity under the bucket number you selected. For example, if the tickets use Shared Allocation #1, enter the shared inventory under QTY 1, then click SAVE.
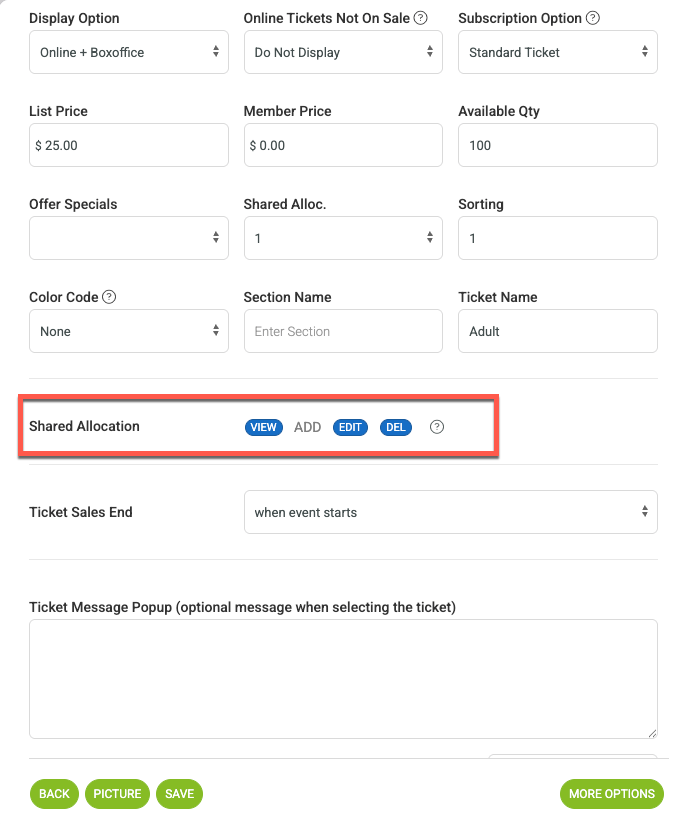
Enter the shared inventory in the quantity field that matches the selected bucket number.
How Much Should the Shared Allocation Be?
The shared allocation should be the number of tickets that are still available for sale at the time you set it up.
Formula
Maximum capacity - tickets already sold = shared allocation remaining
Maximum event capacity | 100 |
Tickets already sold | 5 |
Shared allocation to enter | 95 |
If no tickets have been sold yet, the shared allocation can simply be the full event capacity. If tickets have already sold, subtract those sales first so you do not add inventory back into the event.
Verifying Inventory On An Event
Ticket types using the same shared allocation will display the same allocation number in the Allo. column. The Avail. amount reflects the remaining shared inventory.
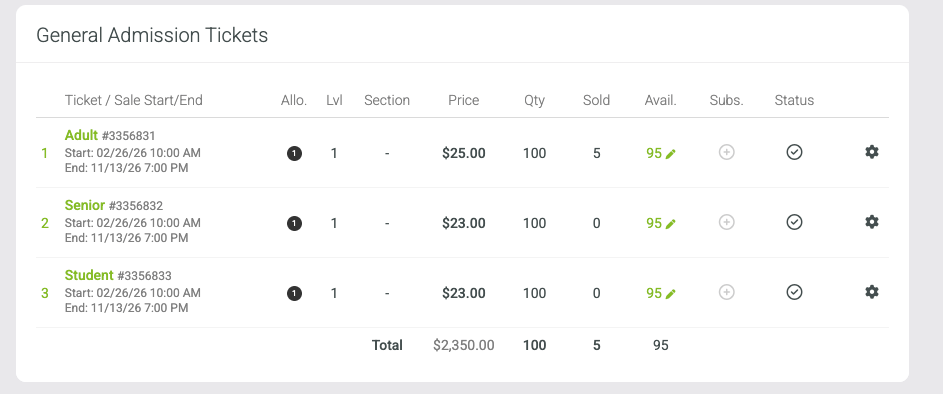
Example after 5 tickets have sold: all three ticket types use Allocation #1 and show 95 tickets remaining.
Adjusting Shared Allocation After Sales Have Started
If you add shared allocation after tickets have already sold - or need to correct the remaining quantity - update the allocation to the number of tickets that are still available, not the original capacity.
From EVENTS > MANAGE EVENTS > TICKETS on the event, use the edit option next to the available quantity to open the shared allocation editor. Enter the remaining amount in the appropriate bucket and save the change.
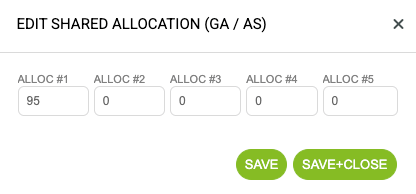
Example: 100 maximum tickets - 5 already sold = 95 remaining in Shared Allocation #1.
Important
In the example above, entering 100 after 5 tickets were already sold would effectively make 100 more tickets available. Enter 95 so the event still caps at 100 total sales.
Quick Checklist
• Create each general admission ticket type and set its individual maximum quantity.
• Assign the same Shared Alloc. number to every ticket type that should use the same inventory pool.
• Set the bucket quantity to the inventory currently remaining for sale.
• If tickets have already sold, subtract those sales before entering the shared quantity.
You can use Shared Allocation buckets #1 through #5 when separate groups of ticket types need separate shared inventory pools.