Single ticket buyers vs. subscribers report
The video below demos how to use the custom sales and custom patron reports to identify subscribers/members from non-subscribers and non-members.
To get to the Custom Sales Report area, go to REPORTS > CUSTOM SALES REPORT.
Helpdoc: Custom sales report
Custom Sales Report Basics: How to build a report
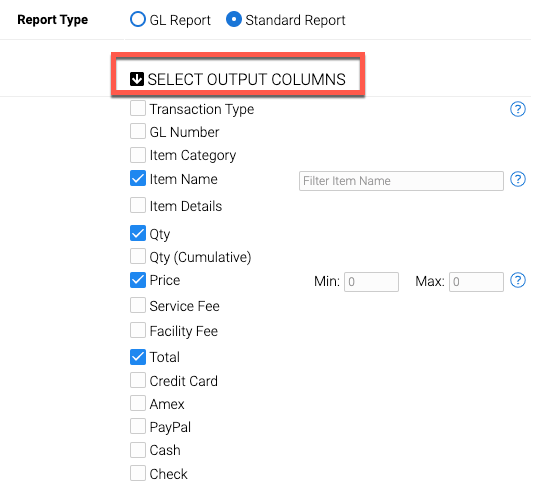
Step 1: Select the column outputs you would like to see in the report.
Common outputs are things like: Item Name, Qty, Price, Total, or payment methods like Cash, Credit Card, Check, etc.
Step 2:
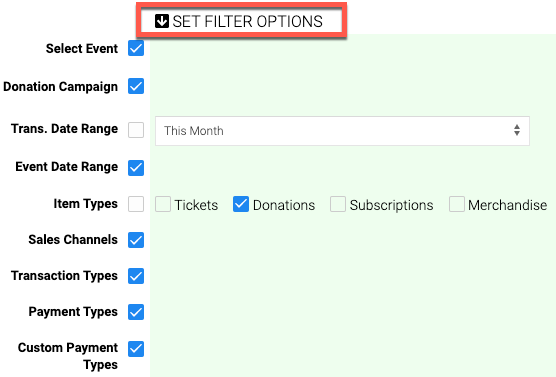
Set any filter options you would like to narrown down the report.
Common filter options are things like: transaction date range, event date range, item type, or narrowing the report down to a specific event or item type.
The example picture below is filtering "donations" for "this month."
Step 3:
Name the report on the bottom of the page, press SAVE, or SAVE + RUN.

Custom Patron Report
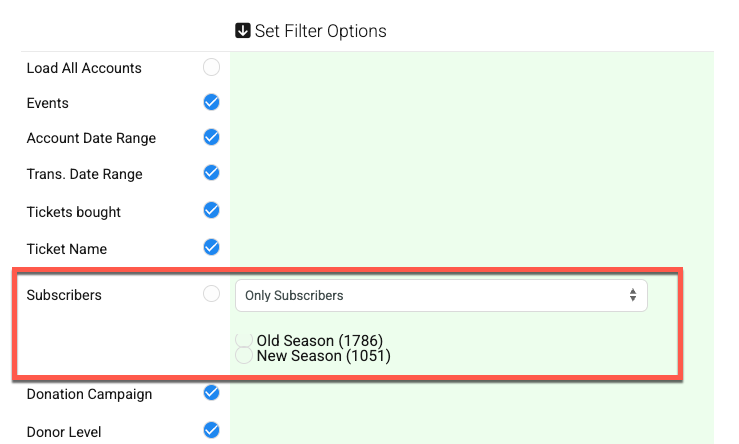
Use the Subscribers filter at the bottom of the Report Builder to control which patrons are included:
- All patrons (subscribers and non-subscribers)
- Only Subscribers
- Exclude Subscribers
Custom Sales Report Options
To view subscriber vs. non-subscriber ticket information, select the output column “Sub Ticket Type.” The report will display the following values:
- Sub Free – Subscriber free tickets
- Sub Discount – Discounted subscriber tickets (e.g., Pick-a-Show or member discounts)
- Flex Pass – Flex Pass tickets
- Blank – Non-subscriber tickets

Note: The Custom Sales Report does not include options to filter by subscriber status (e.g., “subscribers only” or “exclude subscribers”). It displays all transactions matching the search criteria and indicates the sub free, sub discount, flex pass, or blank column.