How to build your own seat maps
This help doc will cover building your own seat maps.
NOTE: After a seat map is built for a venue, it doesn't need to be built again. You can simply create a pricing template or copy an existing pricing template.
Assigned Seating Pricing Templates Using Price Groups
Building a seat map is a two-step process.
Uploading a background image.
Laying seats on top of the background image.
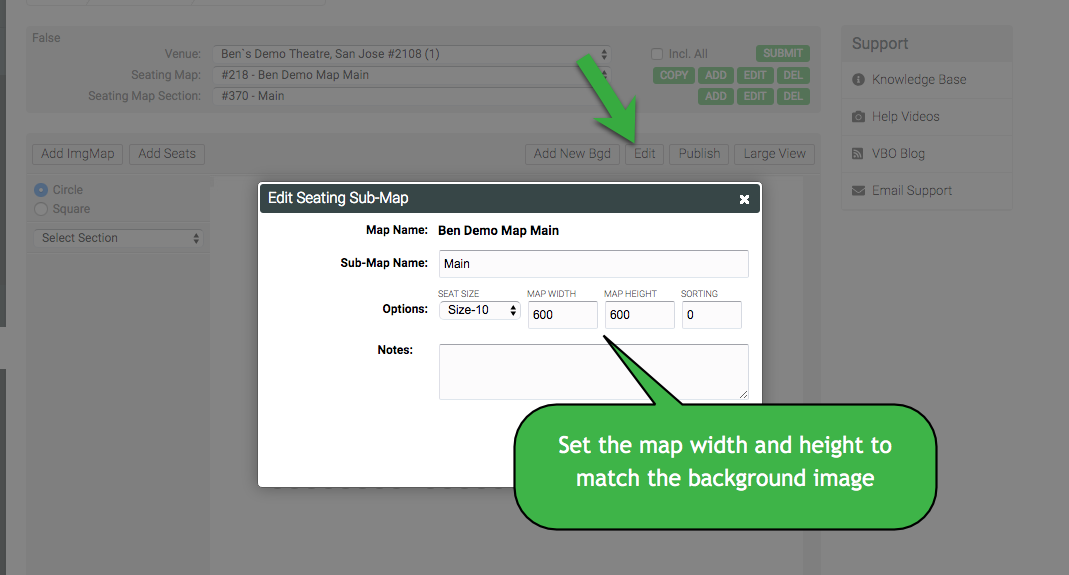
When setting up the seat map background image, make sure the image dimensions of the background image are entered.
Example:
When building seat maps, the Seats Per Row value should be set to the highest seat number you want displayed in that row, while the Start At value determines the first seat number in the range. The same logic applies when building rows.
For example, if you want the row to display seats 100 through 119, you would configure:
Seats Per Row: 119
Start At: 100
This setup would correctly generate seats 100–119.
The same logic applies to rows. For example, if you wanted to build rows D–F, you would configure:
Rows: F (6)
Start At: D (4)
This setup would correctly generate rows D–F.