Custom patron report
How to Use the Custom Patron Report
Build reusable patron lists using customer details, event activity, donation history, tags, and other account criteria.
What is the Custom Patron Report?
The Custom Patron Report lets you choose which patron fields appear in the report and then apply filters to decide which accounts should be included. After saving the report, you can run it again, sort or export the results, share it with other users, or schedule it for email delivery.
Create a Custom Patron Report
1. Open Custom Patron Reports
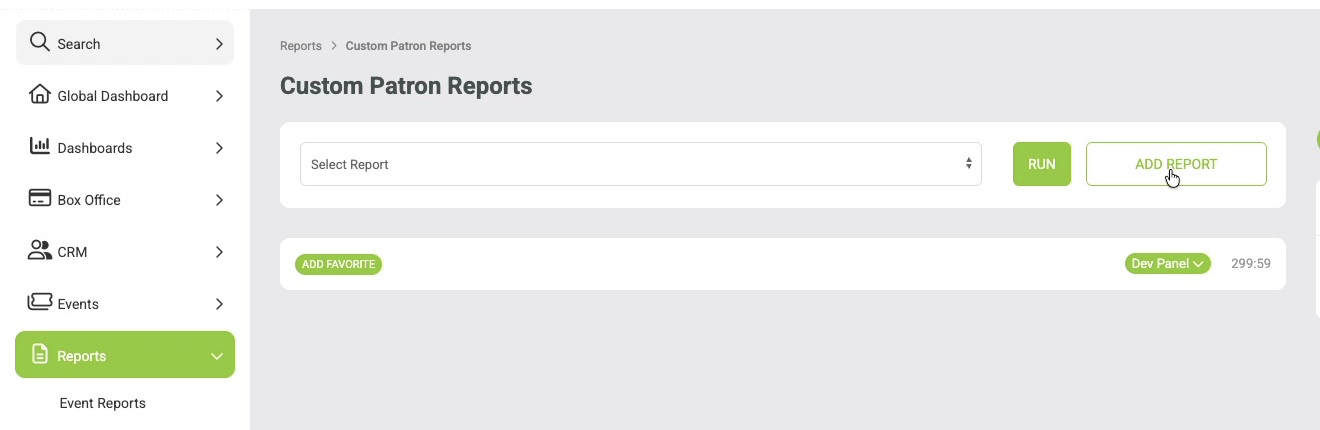
Go to Reports > Custom Patron Report. Select an existing report from the dropdown, or click Add Report to build a new one.
2. Select the output columns
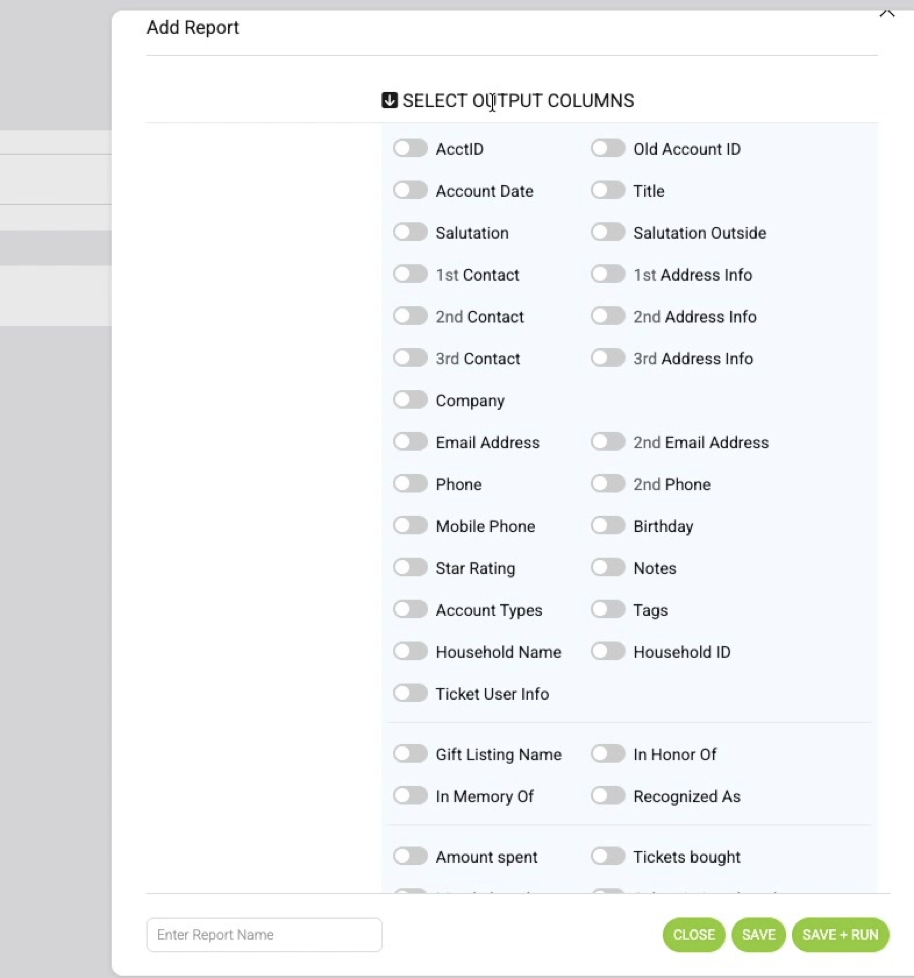
Turn on the fields you want to appear as columns in the finished report.
Examples include 1st Contact, Email Address, Phone, Mobile Phone, Birthday, Etc.
3. Set the report filters
Use Set Filter Options to define the patron activity you want to search. Turn on only the filters that are relevant to the list you are building.
Load All Accounts can be used when you want to begin with the full account list.
Event filters let you select one or more events.
Additional filters shown in the report builder include Event Categories, Event Sub-Categories, Account Date Range, Transaction Date Range, Tickets Bought, Ticket Name, Subscribers, Donation Campaign, Donor Level, Donate Amount, Contact Permissions, Tags, Account Types, Etc.
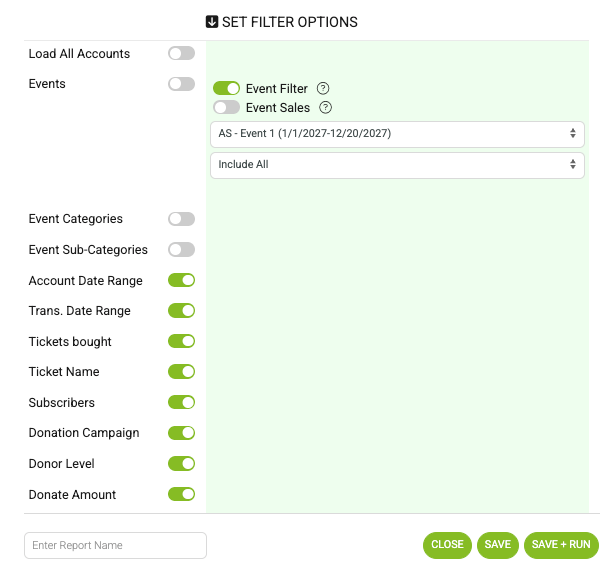
Example: filtering the patron report by selected events.
4. Use include and exclude criteria when needed
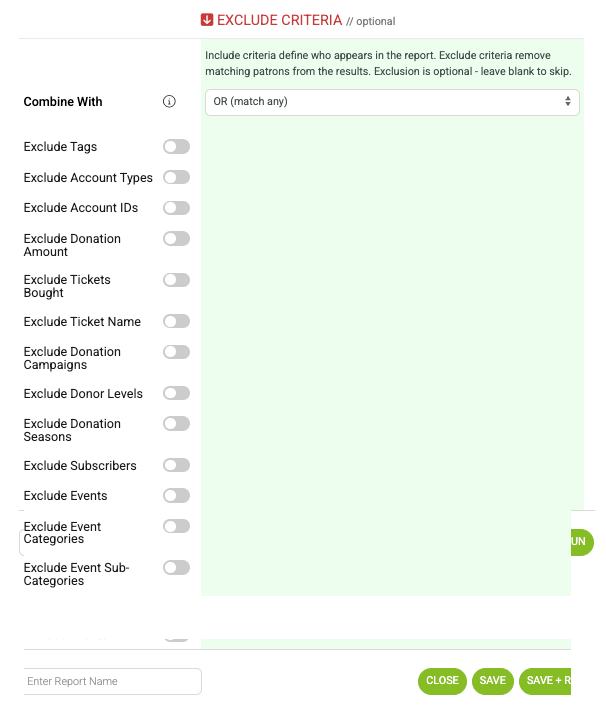
The criteria section gives you more control over which matching patrons are returned. Use the Combine With setting to determine how multiple criteria should work together.
OR (match any): a patron can match any of the selected criteria.
AND (match all): a patron must match all selected criteria.
Exclude Criteria is optional. Use it when you want to remove patrons who match specific conditions from the final results.
Tip
Start with the broad filter that identifies the audience you want, then use criteria to narrow or exclude accounts. This usually makes complex patron lists easier to build.
Save and Run the Report
5. Name and save the report
Enter a report name at the bottom of the report builder. Choose Save to keep the setup, or Save + Run to save it and immediately generate the results.
6. Review the results
When the report runs, the selected output columns display for each matching patron. You can rerun the saved report later from the report dropdown.
A saved report can be run again and provides Print, Export, Sorting, Edit, Share, and Email options.
Work With a Saved Report
7. Sort the results
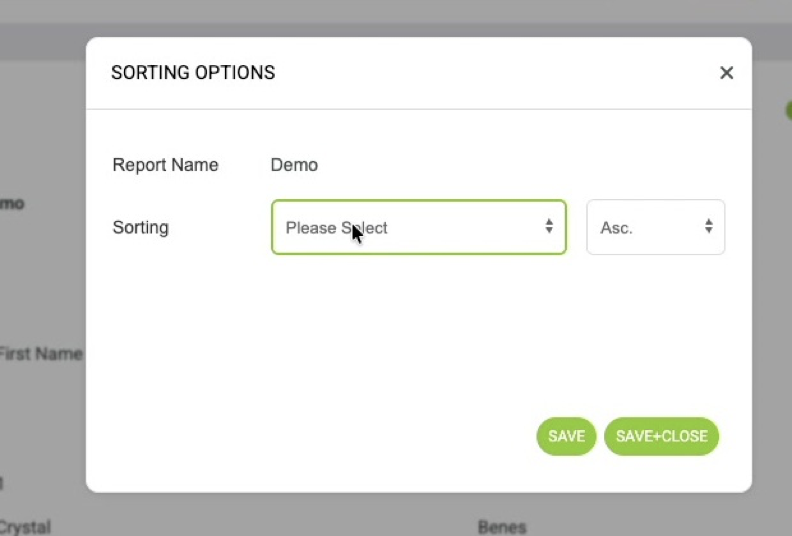
Click Sorting to select a report field and choose ascending or descending order. Save the sorting option when finished.
8. Print or export the report
Use Print for a printable version of the report, or Export when you need the report data outside VBO.
9. Edit, share, or email the report
Use the settings menu next to the saved report to access Edit, Share, and Email.
Edit reopens the report builder so you can change output columns, filters, criteria, or the report name.
Share lets you make the report available to selected VBO users.
Email lets you enable scheduled delivery, choose the release day and time, optionally set a start/end schedule, add a release message, and select the users who should receive it.
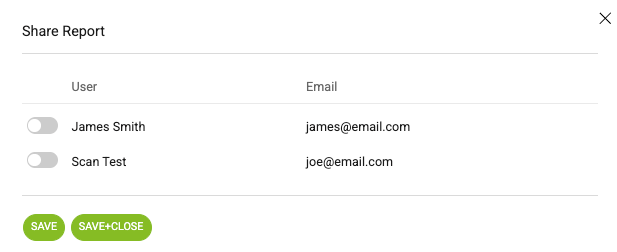
Select the VBO users who should have access to the shared report.
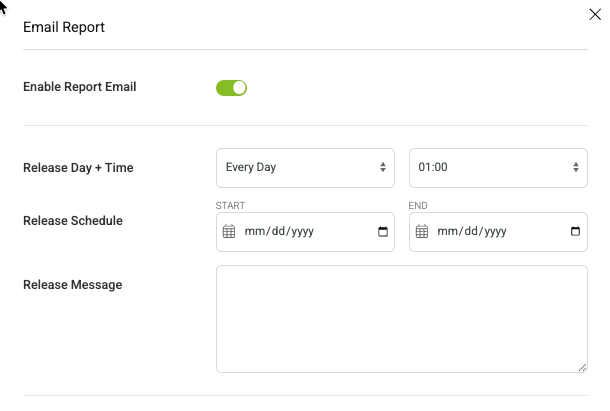
Enable report email and configure its delivery schedule and recipients.
Summary
Custom Patron Reports are reusable. Once the report is saved, you can select it from the dropdown and click Run whenever you need an updated list based on the report settings.