Custom sales report
Use the Custom Sales Report to build saved reports around the sales, order, event, payment, and accounting information you need. This guide covers the basic report-building workflow, including the Standard Report and GL Report options.
Where to find it: Go to REPORTS > CUSTOM SALES REPORT.
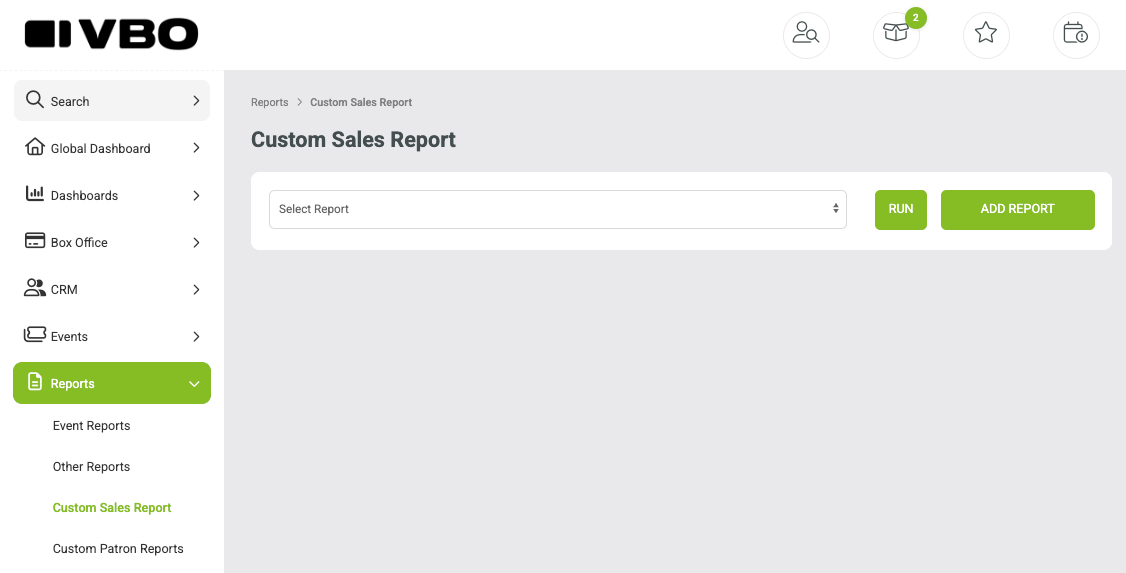
How to build a report
Step 1: Add a report and choose the report type
Click ADD REPORT. At the top of the builder, choose the report type you want to create:
Standard Report - provides the broad set of selectable sales, order, event, item, and payment outputs and filters.
GL Report - use this option when you are building a report around GL/accounting information. The available selections may differ from the Standard Report.

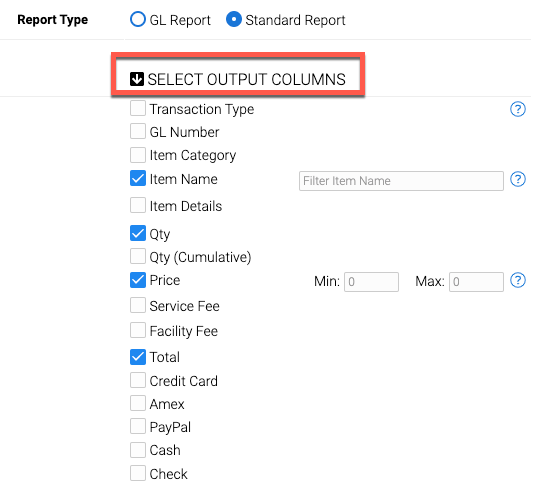
Step 2: Select the output columns
Output columns determine what information appears in the finished report. Select the fields you want included.
Common output columns include:
Item Name, Item Details, quantity (qty), price, total
Payment methods such as Credit Card, Cash, Check, Gift Card, Account Credit, and other available payment types
Accounting fields such as GL Number when applicable
Step 3: Set your filter options
Use Set Filter Options to narrow the report to the records you actually need. Choose the filter categories you want available, then select the appropriate values or date ranges.
Common filters include:
Select Event (specific event or multi-event info)
Transaction Date Range - filter by when the transaction was entered/processed
Event Date Range - filter by the date of the event
Item Types - Tickets, Donations, Subscriptions, or Merchandise
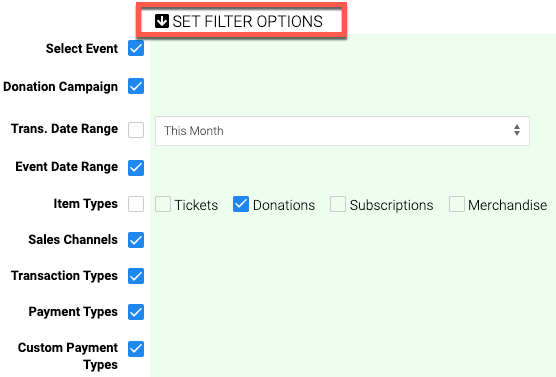
Example: To create a donations report for the current month, choose the appropriate donation/item output fields, filter Item Types to Donations, and set the Transaction Date Range to This Month.
Step 4: Name, save, and run the report
Enter a report name at the bottom of the builder. Then choose:
SAVE - saves the report so you can run it later.
SAVE + RUN - saves the report and immediately displays the results.

Working with a saved report
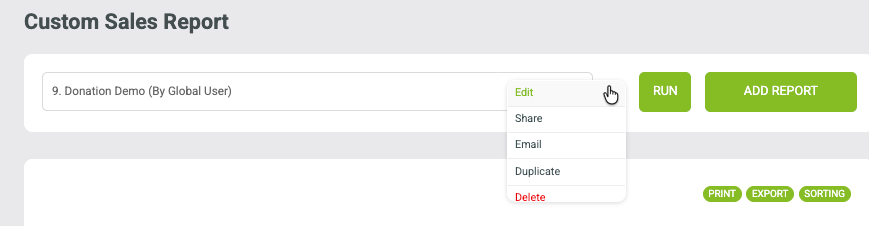
After a report is saved, select it from the report dropdown and click RUN whenever you need updated results. The results page also gives you tools to Print, Export, and adjust Sorting.
A saved report can be selected and run again at any time. Print, Export, and Sorting options appear above the results.
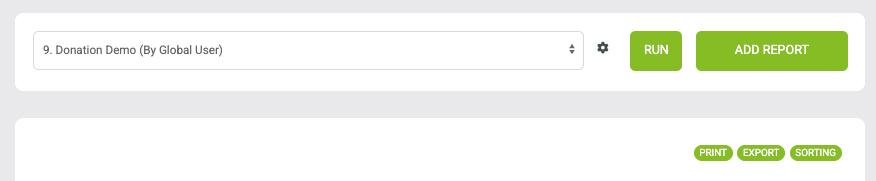
Use the gear icon next to a saved report for additional report-management options:
Edit
Share
Email
Duplicate
Delete Report
Report sharing and email
Want to share a report with other users in your organization or schedule report emails? See: How to use the e-mail and sharing features in custom reports
Terminology
Term | What it means |
Date Audited / Date Audit | The audit history date associated with a sale or refund transaction. |
Date Created | The date the transaction or order was created. |
Date Entered | The date the transaction was entered or rung into the system. |
Tip: The Custom Sales Report is designed to be reusable. Once you create and save the report structure you need, select it from the dropdown and run it again whenever you need refreshed data.