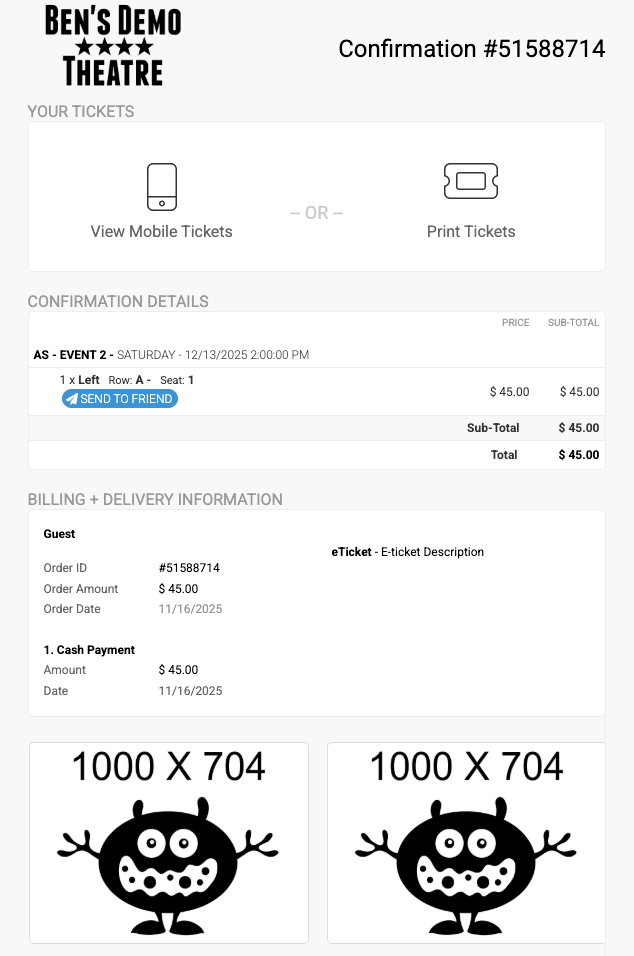
Ads on e-tickets and order confirmations
This guide explains how to create and display ads on your order confirmations and e-tickets.
Accessing the Advertising Settings
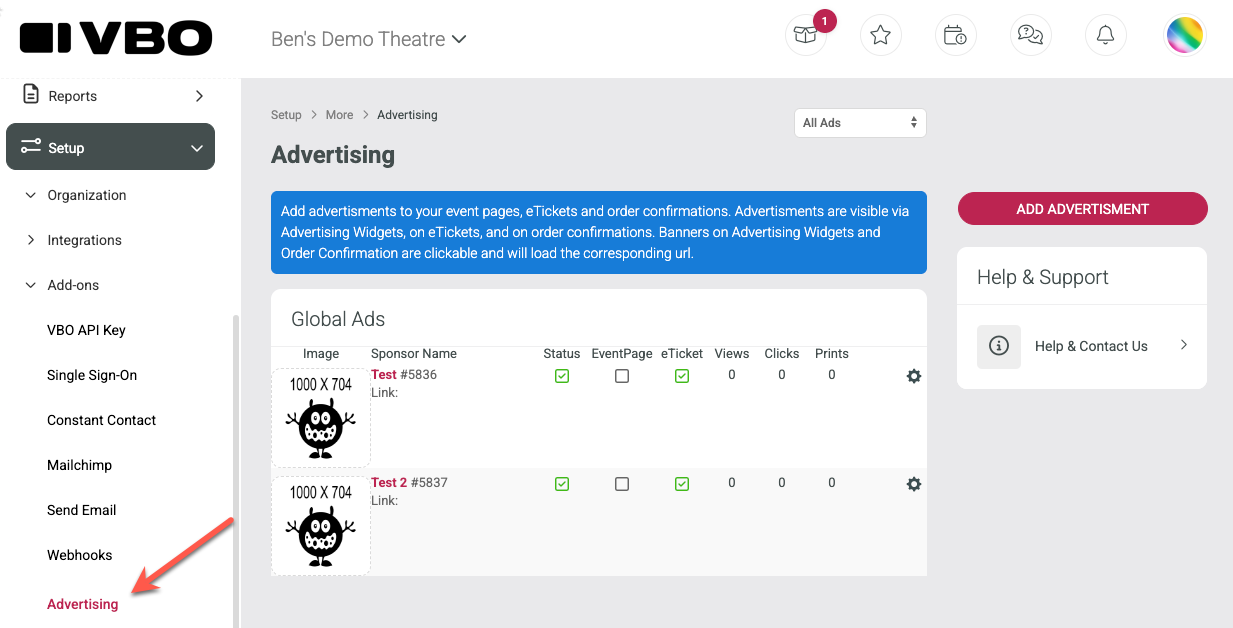
Go to the Setup area.
Click on Add Ons.
Click on Advertising.
Creating a New Advertisement
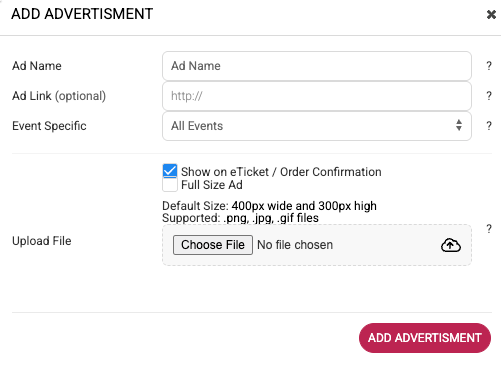
On the Advertising page, click Add Advertisement.
Enter a name for your advertisement.
(Optional) Enter a URL. If a URL is added, customers can click the advertisement from their computer or phone and be taken to that link.
Choosing Where the Ad Appears
You can choose to display your advertisement on all events or select a specific event.
Check the option to show the ad on e-ticket and order confirmation pages.
Selecting Ad Size
- You can choose either a quarter-page ad or a full-page ad.
- Order confirmations and e-tickets can show up to four quarter-page ads at a time, or one full-page ad.
- If you have more than four ads, the system will rotate through them.
Rotation also applies if you have a mix of full-page ads and quarter-page ads.
Ads appear in three places:
On the confirmation page immediately after a sale
In the order confirmation email
On the e-tickets
Uploading Your Ad File
Click Choose File.
Upload a PNG or JPEG image file.
Click Add Advertisement.
Repeat the process if you want to create additional ads.
Viewing Your Advertisement
To verify your advertisement is displaying correctly, open any order and view the order confirmation. The advertisement will appear in its assigned section on the bottom of the page.